

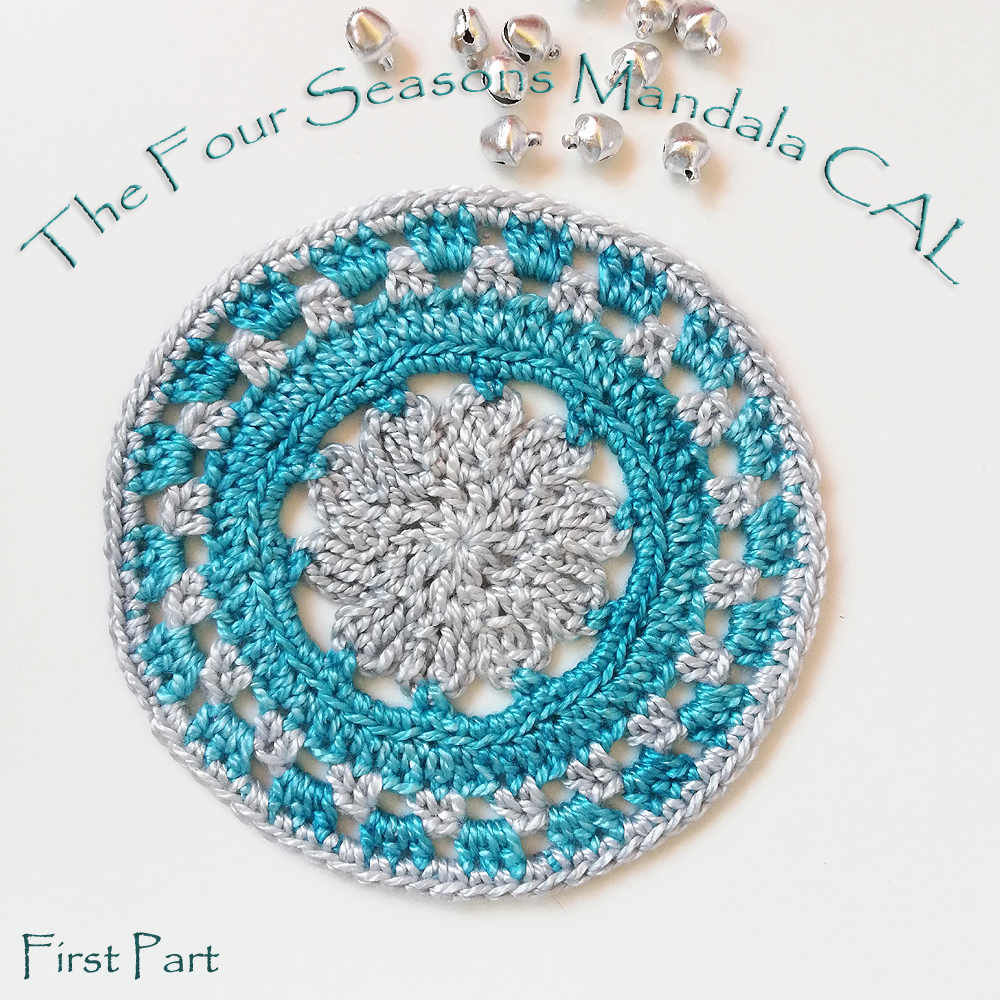
And here we are… at the first part of The Four Seasons Mandala CAL
Hope you really have fun and enjoy this mandala.
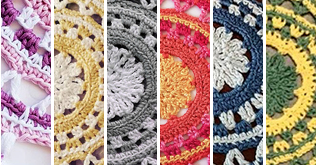
I will be anxiously waiting to see your progresses and so curious to see all the colourways everyone will choose. I love colours, all of them.
The Four Seasons Mandala CAL – First Part
Material
- Eco-Bamboo by Nurturing Fibres in two different colors – approximately 30g of each colour
- 5mm hook
Used Stitches and abbreviations (US Terms)
Ch – Chain
Sl st – Slip stitch
Sc – Single crochet
Hdc – Half double crochet
Dc – Double crochet
Tr – Treble crochet
V-st – V-Stitch. (Dc, ch2, dc) in the indicated stitch.
Spike sc – Spike single crochet. (The same as a single crochet but as it is placed further down in the work you keep it loose and the finished stitch looks longer.) Insert hook in the indicated st or sp, yarn over, pull up a loop till you reach the height of the stitch worked before. Yarn over, pull through 2 loops.
Puff-st – Yarn over and insert your hook into the indicated stitch. Yarn over and pull up a long loop (3 loops on hook). (Yarn over and insert your hook into the same stitch/space. Yarn over again and pull up a long loop) three more times. Now you will have 9 loops on your hook. Yarn over and pull through all 9 loops. Make 1 ch to close the puff ( this will prevent the puff from getting loose).
Picot – Ch4. Sl st catching FLO and side bar of the stitch.
Fpsc – Front post single crochet. Insert the hook from front to back to front again, around the indicated stitch and work a sc.
Sc2tog – Two single crochet worked together. Insert hook in the indicated st or sp, yarn over, pull up a loop, insert hook in the second indicated st or sp, yarn over, pull up a loop. Yarn over and pull through all 3 loops.
BLO – Back loop
FLO – Front loop
-sp – Space
——————– 🌷🌷🌷 ——————–
Pattern
Rnd 1: (color A) In a magic ring work a ch4 (counts as your first dc + ch1). (Dc, ch1) 9 times. Sl st to the 3rd ch of the beg-ch4. Do not cut yarn. [10 dc, 10 ch1-sp]

Rnd 2: *Ch4, tr in next ch1-sp, ch4, sl st into the next stitch.** Repeat from * to ** until the end of the rnd. You will have 10 petals. Cut yarn and sew ends. [10 tr, 20 ch4, 10 sl st]

Rnd 3: (color B) Start with a standing sc in any tr from rnd 2. *Ch4, sc in next tr from previous rnd** Repeat from * to ** omitting last sc. Sl st to the first sc. Do not cut yarn. [10 sc, 10 ch4-sp]

Rnd 4: Ch1 (does not count as a st). Sc in same st. *4 sc in next ch4-sp. Sc in next st.** Repeat from * to ** omitting last sc. Sl st to the first sc. Do not cut yarn. [50 sc]

Rnd 5: Work all rnd in BLO. Ch2 (counts as your first hdc). Hdc in same st. *Hdc in next 4 sts. 2 hdc in next st.** Repeat from * to ** omitting the last 2 hdc. Sl st to the first hdc. Cut yarn and sew ends. [60 hdc]

Rnd 6: (color A) Start with a standing hdc in any st. Hdc in next st. *Ch2. Skip next st. Hdc in next 2 sts.** Repeat from * to ** omitting last 2 hdc. Sl st to the first hdc. Cut yarn and sew ends. [40 hdc, 20 ch2-sp]

Rnd 7: (color B) Start with a standing hdc in any ch2-sp. 2 hdc in same ch2-sp. Ch1. *3 hdc in next ch2-sp. Ch1.** Repeat from * to **. Sl st to the first hdc. Cut yarn and sew ends. [60 hdc, 20 ch1-sp]

Rnd 8: (color A) Start with a standing sc in any ch1-sp. Sc in same ch1-sp. *Skip next st. Sc in next 2 sts. 2 sc in next ch1-sp.** Repeat from * to ** omitting last 2 sc. Sl st to the first sc. Cut yarn and sew ends. [80 sc]

——————– 🌷🌷🌷 ——————–
This is how your mandala will look like, at this stage.
You can add your project in Ravelry, in group CAL – Crochet Along (Facebook), in Instagram with #thefourseasonsmandala and #oneskeinoflove hastags. In Instagram you can tag me in your posts – @ana.moraissoares
See you all tomorrow…
Sending Love 🌷
Ana
——————– 🌷🌷🌷 ——————–
Mandala Las Cuatro Estaciones – Mini Tejiendo Juntos (CAL) – Parte 1
Material:
- Eco-Bamboo de Nurturing Fibres en dos colores diferentes – aproximadamente 30 grs. de cada color.
- Ganchillo 3.5 mm
Puntos Utilizados
cad – cadena(s), cadeneta(s)
pd – punto deslizado, punto raso, punto enano
pb – punto bajo, medio punto
mv – media vareta, medio punto alto, medio punto entero
v – vareta, punto alto, punto entero
vd – vareta doble, punto alto doble, punto entero doble
punto-V – (v, 2 cad, v) en el punto indicado.
pbTD – punto bajo tomado por delante
pb largo – punto bajo largo. (Es igual al pb pero se hace más abajo, por lo que debe mantener su tensión suelta y la apariencia final del punto es como si fuera más largo.) Insertar el ganchillo en el punto o E indicado, tomar 1 lazada, pasar el hilo hacia el frente y estirarlo hasta obtener la altura del punto hecho anteriormente. Tomar una nueva lazada, pasar el hilo a través de los 2 bucles.
Punto puff – Tomar 1 lazada e insertar el ganchillo en el punto indicado. Tomar otra lazada, pasar el hilo hacia el frente y estirarlo para alargarlo (3 bucles en el ganchillo). (Tomar 1 nueva lazada e insertar el ganchillo en el mismo punto/espacio. Tomar una lazada nuevamente, pasar el hilo hacia el frente y estirarla para alargarla) tres veces más. Ahora hay 9 bucles en el ganchillo. Tomar una última lazada y pasar el hilo a través de los 9 bucles en el ganchillo. Hacer 1 cad para cerrar el puff (esto evitará que el puf se suelte).
Picot – 4 cad. pd tomando la hebra anterior y la hebra vertical del punto.
HP – hebra posterior
HA – hebra anterior
E – espacio
Patrón
Vuelta 1: (color A) En un anillo mágico hacer 4 cad (cuenta como primera v + 1 cad). (v, 1 cad) 9 veces. Pd en la 3a cad del inicio de la vuelta. No cortar el hilo. [10 v, 10 E de 1 cad]
Vuelta 2: *4 cad, vd en el E de 1 cad, 4 cad, pd en el siguiente punto.** Repetir desde * hasta ** hasta el final de la vuelta. Tendrá 10 pétalos. Cortar el hilo y esconder los extremos. [10 vd, 20 E de 4 cad, 10 pd]
Vuelta 3: (color B) Comenzar con un pb de pie en cualquier vd de la vuelta 2. *4 cad, pb en la siguiente vd de la vuelta anterior** Repetir desde * hasta ** omitiendo el último pb. Pd en el primer pb. No cortar el hilo. [10 pb, 10 E de 4 cad]
Vuelta 4: 1 cad (no cuenta como 1 punto). Pb en el mismo punto. *4 pb en el siguiente E de 4 cad. Pb en el siguiente punto.** Repetir desde * hasta ** omitiendo el último pb. Pd en el primer pb. No cortar el hilo. [50 pb]
Vuelta 5: Trabajar toda la vuelta en la HP. 2 cad (cuenta como primera mv). Mv en el mismo punto. *Mv en los siguientes 4 puntos. 2 mv en el siguiente punto.** Repetir desde * hasta ** omitiendo las últimas 2 mv. Pd en la primera mv. Cortar el hilo y esconder los extremos. [60 mv]
Vuelta 6: (color A) Comenzar con una mv de pie en cualquier punto. Mv en el siguiente punto. *2 cad. Saltar el siguiente punto. Mv en los siguientes 2 puntos.** Repetir desde * hasta ** omitiendo las últimas 2 mv. Pd en la primera mv. Cortar el hilo y esconder los extremos. [40 mv, 20 E de 2 cad]
Vuelta 7: (color B) Comenzar con una mv de pie en cualquier E de 2 cad. 2 mv en el mismo E de 2 cad. *1 cad. 3 mv en el siguiente E de 2 cad.** Repetir desde * hasta ** omitiendo las últimas 3 mv. Pd en la primera mv. Cortar el hilo y esconder los extremos. [60 mv, 20 E de 1 cad]
Vuelta 8: (color A) Comenzar con 1 pb de pie en cualquier E de 1 cad. Pb en el mismo E de 1 cad. *Saltar el siguiente punto. Pb en la siguiente 2 puntos. 2 pb en la siguiente E de 1 cad.** Repetir desde * hasta ** omitiendo los últimos 2 pb. Pd en el primer pb. Cortar el hilo y esconder los extremos. [80 pb]
Puedes compartir tu Mandala Las Cuatro Estaciones en Ravelry, en el grupo de Facebook CAL – Crochet Along y también en Instagram usando las etiquetas #thefourseasonsmandala y #oneskeinoflove. En Instagram también puedes etiquetarme en tus publicaciones – @ana.moraissoares
Muchas gracias a todos ustedes que decidieron unirse y apoyar el diseño y este Tejiendo Juntos (CAL).
¡Espero que todos se diviertan! 🌷

2 thoughts on “The Four Seasons Mandala CAL – first part”